Updated for CapCut 2026 | Beginner & Pro Friendly | Works on Android, iOS & Desktop
Your video is edited, your transitions are smooth, and the music is perfectly synced — but something still feels off. The colors look flat. The mood does not quite land. Sound familiar? That gap between a good video and a great one almost always comes down to color grading, and LUTs are the fastest, most beginner-friendly way to bridge it.
LUTs — short for Look-Up Tables — are essentially color presets that transform the visual tone of your footage in one tap. Professional colorists have used them for decades. Now, CapCutapk has made them accessible to every creator right inside the app, whether you are editing on your phone or on a desktop. And in 2026, CapCut’s LUT features have expanded significantly with new import options, AI-assisted color matching, and better preset libraries.
This guide covers everything: what LUTs actually do, how to apply them step by step, how to import your own custom .cube files, and how to get the most out of CapCut’s updated 2026 color tools. Whether this is your first time hearing the word LUT or you are looking to sharpen your workflow, you are in the right place.
What Are LUTs and Why Do They Matter?
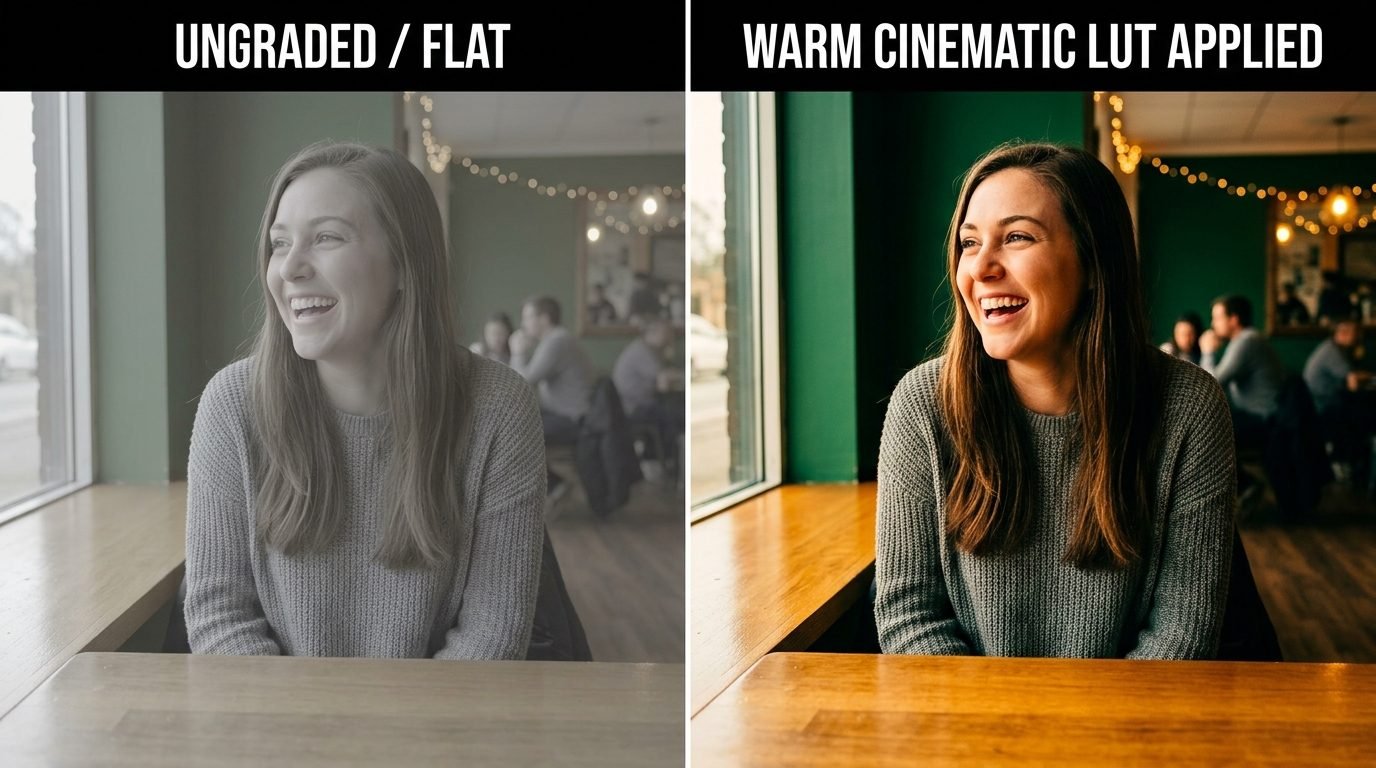
A LUT — Look-Up Table — is a color transformation file that maps the original colors in your footage to a new set of colors. Think of it like a filter, but far more precise. While a basic filter applies the same effect to every pixel equally, a LUT understands the relationship between shadows, midtones, and highlights and adjusts each one specifically. The result looks more natural, more professional, and more intentional.
Color grading used to require expensive software and years of experience. LUTs changed that. A single .cube file contains thousands of color values that tell the editing app exactly how to shift each hue, saturation level, and brightness. When you tap on a LUT in CapCut, all of that complex math happens instantly — and your footage transforms in real time.
Why does this matter for your content? Because color is emotional. A warm, golden LUT feels nostalgic. A desaturated, teal-toned LUT feels cinematic and dramatic. A bright, airy LUT feels fresh and lifestyle-oriented. The right LUT communicates mood without a single word, and it can be the difference between a viewer scrolling past your video or stopping to watch the whole thing.
- LUTs work on all types of footage — travel, vlogs, cinematic shorts, product videos, and more
- They are non-destructive — your original clip stays intact; the LUT is just a visual layer on top
- CapCut supports both built-in LUTs and imported custom .cube LUT files
What Is New in CapCut’s LUT Features in 2026?
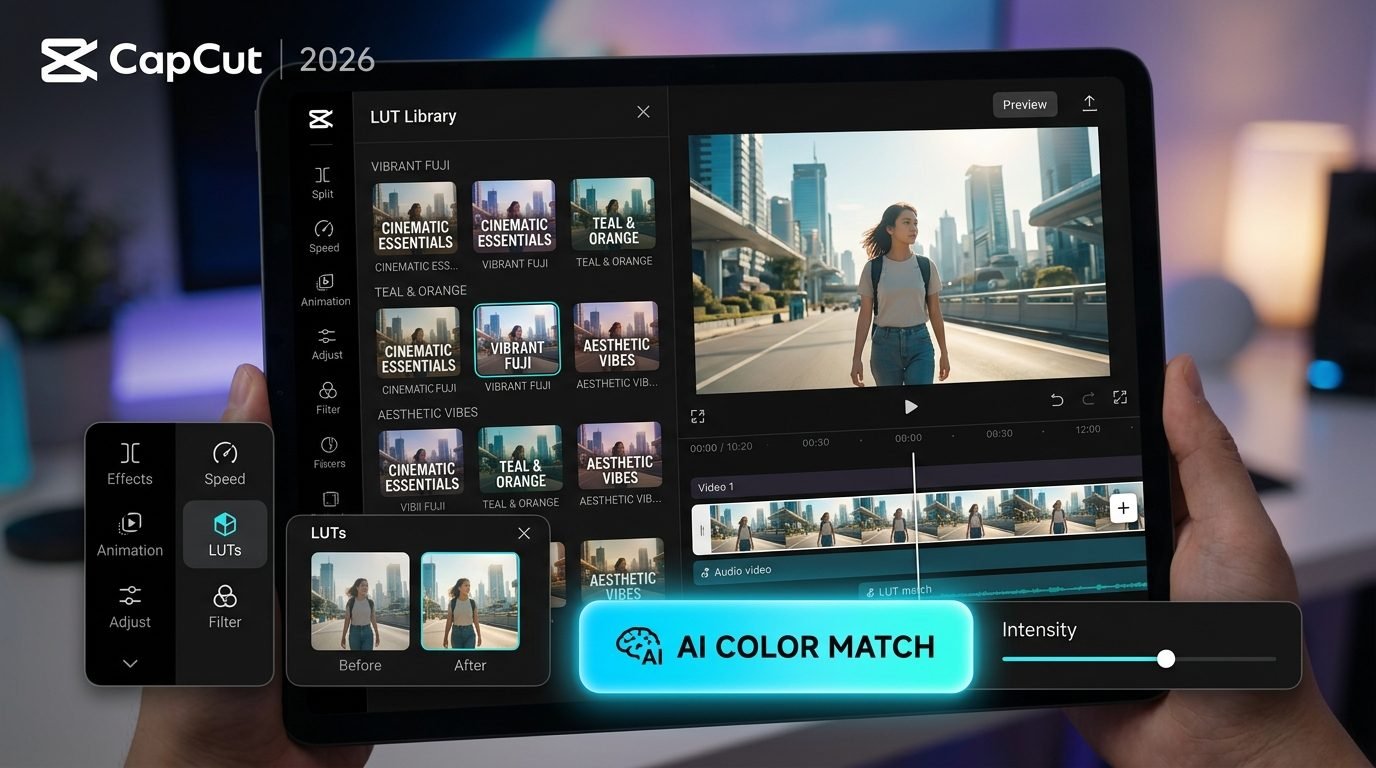
CapCut has made some genuinely useful updates to its color tools heading into 2026. The LUT library has grown, the import process has become smoother, and there are now a few AI-powered tools that sit right alongside LUTs to help you get better results faster. If you last used CapCut’s LUT feature a year or two ago, it is worth taking a fresh look at what has changed.
Key 2026 Updates to CapCut’s Color Tools
| Feature | What Changed in 2026 |
| LUT Library | Expanded preset categories including Log footage LUTs, Skin Tone LUTs, and seasonal mood packs |
| Custom LUT Import | Improved .cube file import with drag-and-drop support on desktop and a dedicated import button on mobile |
| AI Color Match | New AI tool that analyzes a reference image or video frame and suggests a matching LUT automatically |
| LUT Masking | Apply a LUT to a specific region of your frame using the mask tool — useful for sky or subject isolation |
| LUT Keyframing | Fade a LUT in or out over time using keyframes, great for mood transitions within a single clip |
| Desktop Sync | LUTs imported on mobile now sync to the CapCut desktop app via the cloud |
The LUT masking and keyframing features are particularly exciting for creators who want more control. Instead of applying the same color grade to your entire clip uniformly, you can now have a LUT fade in at a dramatic moment or apply a different grade to just the sky versus your subject. These were traditionally advanced techniques reserved for professional software.
The AI Color Match tool is great for beginner creators who want their content to match the aesthetic of creators they admire. You upload or paste a reference frame, and CapCut suggests the closest matching LUT from its library. It is not perfect, but it is a genuinely useful starting point that saves time experimenting.
How to Add LUTs in CapCut — Step-by-Step
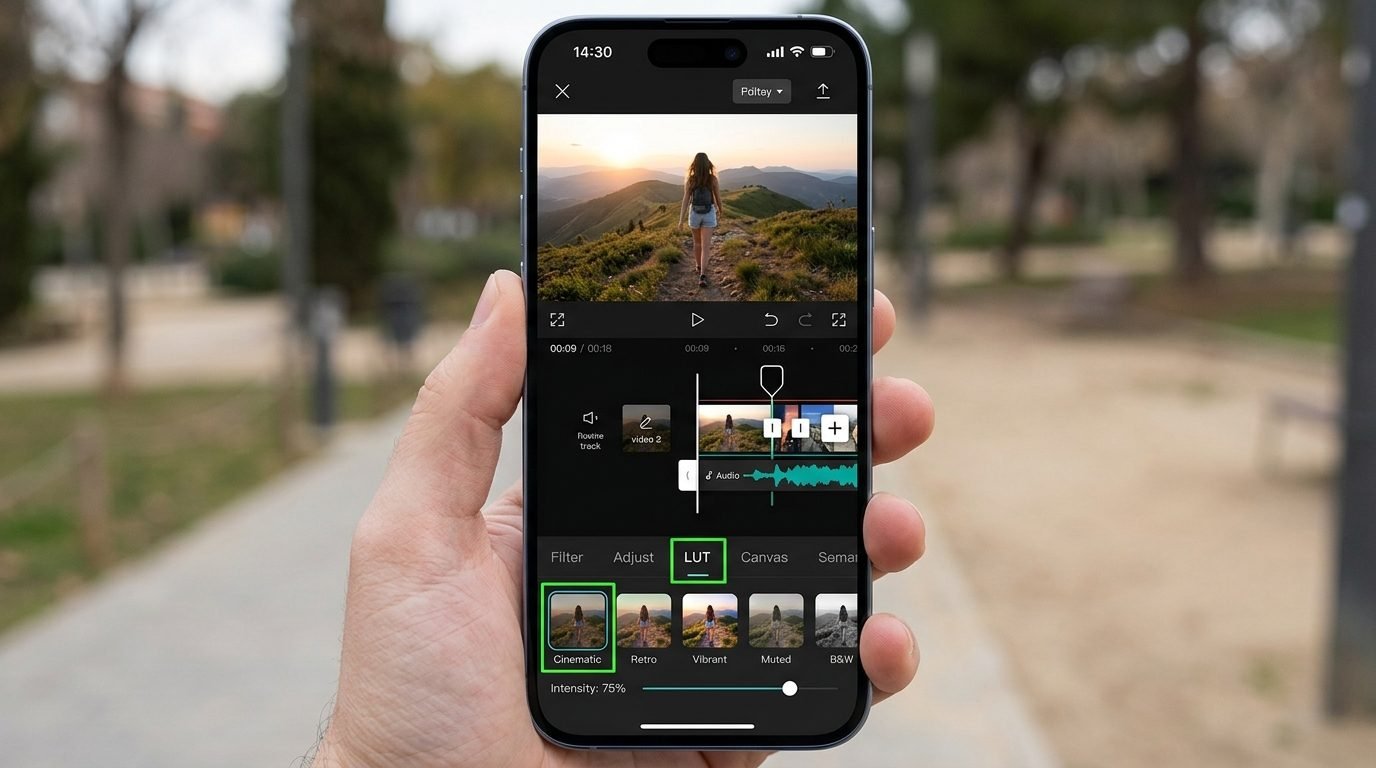
Follow these steps on your Android or iOS device. The process is nearly identical on both platforms. Make sure your CapCut app is updated to the latest 2026 version before you start — some LUT options are only available in newer builds.
| 1 | Open CapCut and Start a New ProjectTap the plus icon on the home screen to start a New Project. Select the video clip you want to color grade from your camera roll or gallery. Once it appears on the timeline, tap the clip to select it before moving on. |
| 2 | Tap ‘Adjust’ in the Bottom ToolbarWith your clip selected, swipe through the bottom toolbar until you see Adjust. Tap it. This opens CapCut’s full color and exposure panel — the home of all manual correction tools as well as LUTs. |
| 3 | Select the ‘LUT’ TabInside the Adjust panel, look for the LUT tab. In 2026 versions of CapCut, it appears as a labeled icon near the top of the adjustment menu. Tap it to open the LUT library. |
| 4 | Browse and Tap a LUT to Preview ItScroll through the LUT presets. As you tap each one, CapCut shows a live preview on your clip instantly. Take your time here — the difference between LUTs can be dramatic, and the right one depends on your footage’s lighting and original color profile. |
| 5 | Adjust the Intensity SliderBelow the LUT thumbnail row, you will find an intensity slider. This controls how strongly the LUT is applied. A setting between 60 and 80 percent tends to look natural for most footage. Cinematic looks may suit 85 to 100 percent, while subtle corrections work best at 40 to 60 percent. |
| 6 | Combine With Manual Adjustments (Optional)After applying your LUT, go back to the main Adjust tools — brightness, contrast, saturation, highlights, and shadows. Minor tweaks after applying the LUT let you personalize it further without needing a different preset. |
| 7 | Preview and ExportPlay your clip to review the full effect. When you are happy, tap the export button in the top-right corner. Choose your resolution and frame rate, then export. CapCut 2026 supports up to 4K export, and the LUT is baked into the final file with no quality loss. |
How to Import Custom LUTs in CapCut (.cube Files)
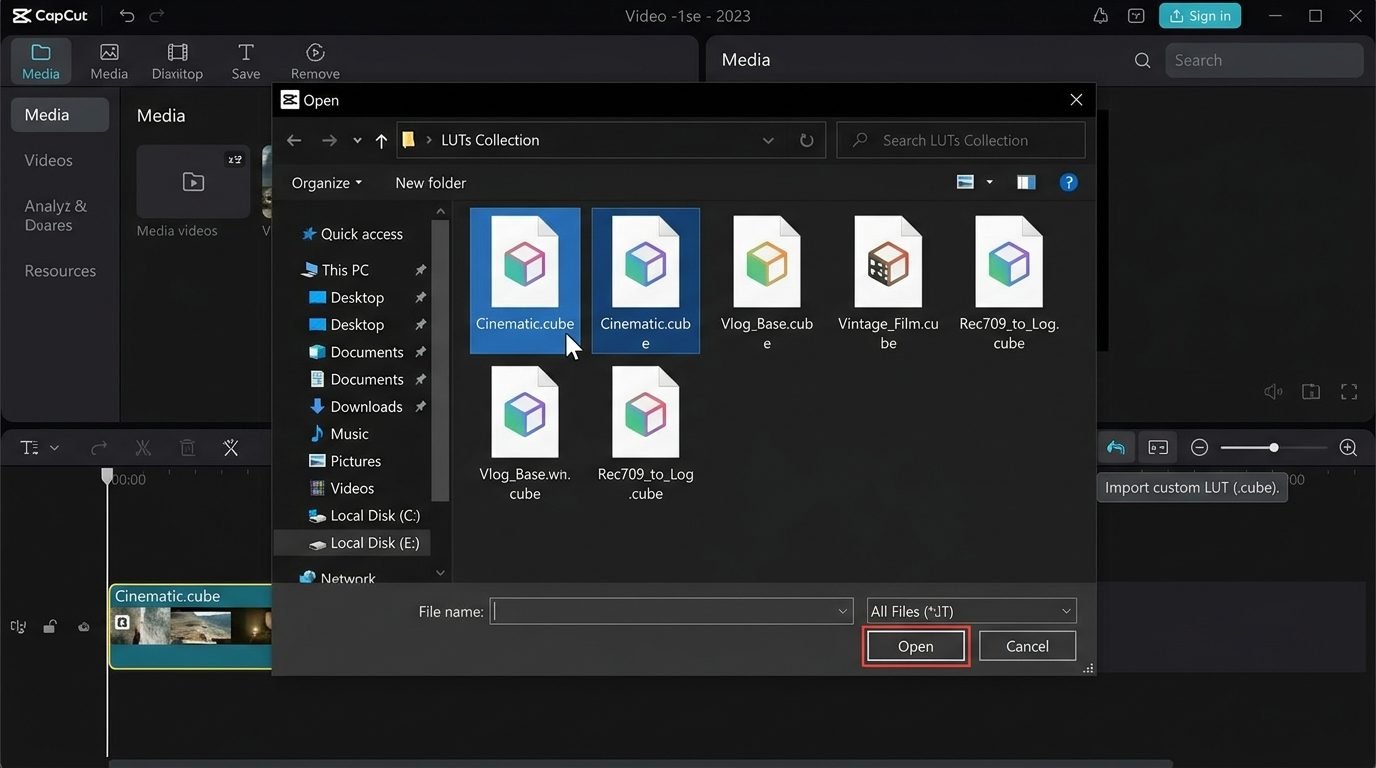
Built-in LUTs are great for getting started, but custom .cube files give you access to thousands of professional-grade looks created by colorists around the world. Many are available for free from creator communities, and they work with any type of footage. Here is how to import them in 2026.
On Mobile (Android and iOS)
- Download a .cube LUT file to your phone — save it to your Files app or Downloads folder
- Open CapCut and start or open an existing project
- Select your clip, tap Adjust, then tap the LUT tab
- Scroll to the end of the LUT library and tap Import LUT or the plus icon
- Navigate to your .cube file in the file browser and tap it to import
- Your custom LUT now appears alongside the built-in presets — tap it to apply
On Desktop (PC and Mac)
- Download your .cube file and save it anywhere on your computer
- Open CapCut desktop, start your project, and select your clip
- In the right panel, click the Color tab, then click LUT
- Click Import LUT and select your .cube file from the file browser
- Apply and adjust intensity just like with built-in LUTs
A few things to keep in mind: CapCut supports standard .cube format LUT files, which is the most common type. If a LUT you downloaded does not appear after import, it may be in an incompatible format such as .3dl or .look. Free tools are available online to convert these to .cube format before importing.
- Good free sources for .cube LUTs: creator forums, color grading communities, and filmmaker resource sites
- LUTs designed for log footage (like S-Log or V-Log) will look washed out on standard camera footage — only use them if your clip was shot in a log profile
- Imported LUTs are saved to your CapCut account and sync across devices in 2026
How to Use LUTs on CapCut Desktop (PC and Mac)
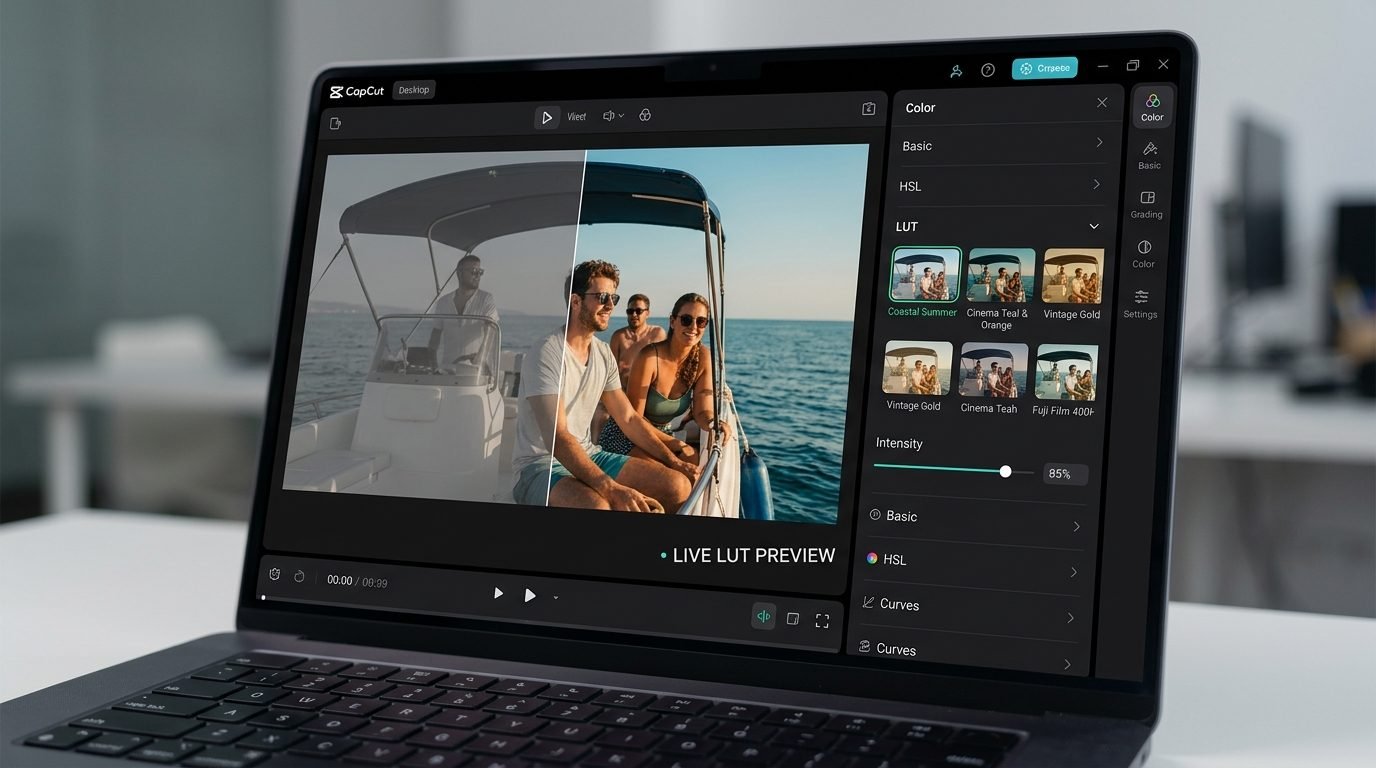
The CapCut desktop app has a more spacious interface than the mobile version, which makes color grading a lot more comfortable when you are working on longer projects or higher-resolution footage. The LUT workflow on desktop is slightly different from mobile but just as straightforward.
Open your project in CapCut desktop and click on the clip in the timeline. On the right side of the screen, you will see a panel with multiple tabs — look for the one labeled Color or Adjust. Inside, you will find the LUT section. Click it to expand the LUT library, which shows the same preset categories as the mobile version.
One advantage of the desktop version is the ability to see a larger preview as you browse LUTs. You can also apply LUTs to multiple clips at once by selecting them all on the timeline before opening the color panel. This saves a lot of time when you want a consistent look across an entire video. The keyframing tool for LUTs is also more accessible on desktop, with a clear timeline at the bottom for setting fade-in and fade-out points.
Best LUT Intensity Settings for Different Video Styles
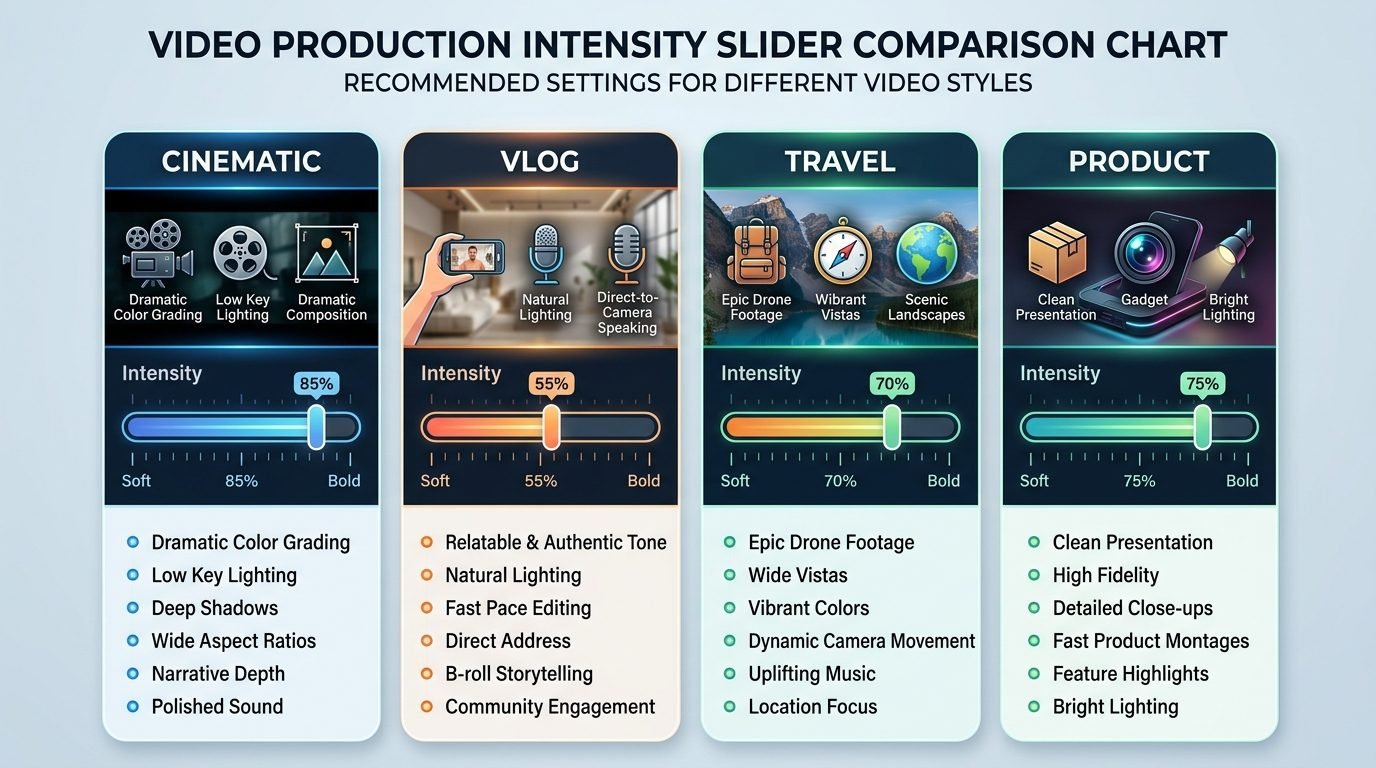
One of the most common beginner mistakes with LUTs is applying them at full 100 percent intensity and then wondering why the footage looks unnatural. LUTs are designed to be blended into your footage, not plastered over it. The right intensity depends on your video style and the specific LUT you are using.
| Video Style | Recommended LUT Intensity |
| Cinematic / Short Film | 75% to 90% — allows the grade to feel strong without overpowering skin tones |
| Travel Vlog | 55% to 70% — keeps the look vibrant while preserving natural colors in landscapes |
| Lifestyle / Beauty Content | 45% to 65% — subtle grades work better for skin tones and indoor lighting |
| Product Video | 50% to 70% — accuracy matters here; avoid oversaturating product colors |
| Night / Dark Footage | 60% to 80% — dark footage responds strongly to LUTs; go easy on shadows |
| Action / Sports | 70% to 85% — punchy looks suit action, but keep highlights from blowing out |
A useful trick: apply your chosen LUT at 100 percent first to see its full effect, then slowly drag the slider down until the footage looks like a more polished, natural version of itself. That point — where the grade feels present but not obvious — is usually your sweet spot.
CapCut’s Built-in LUT Categories Explained
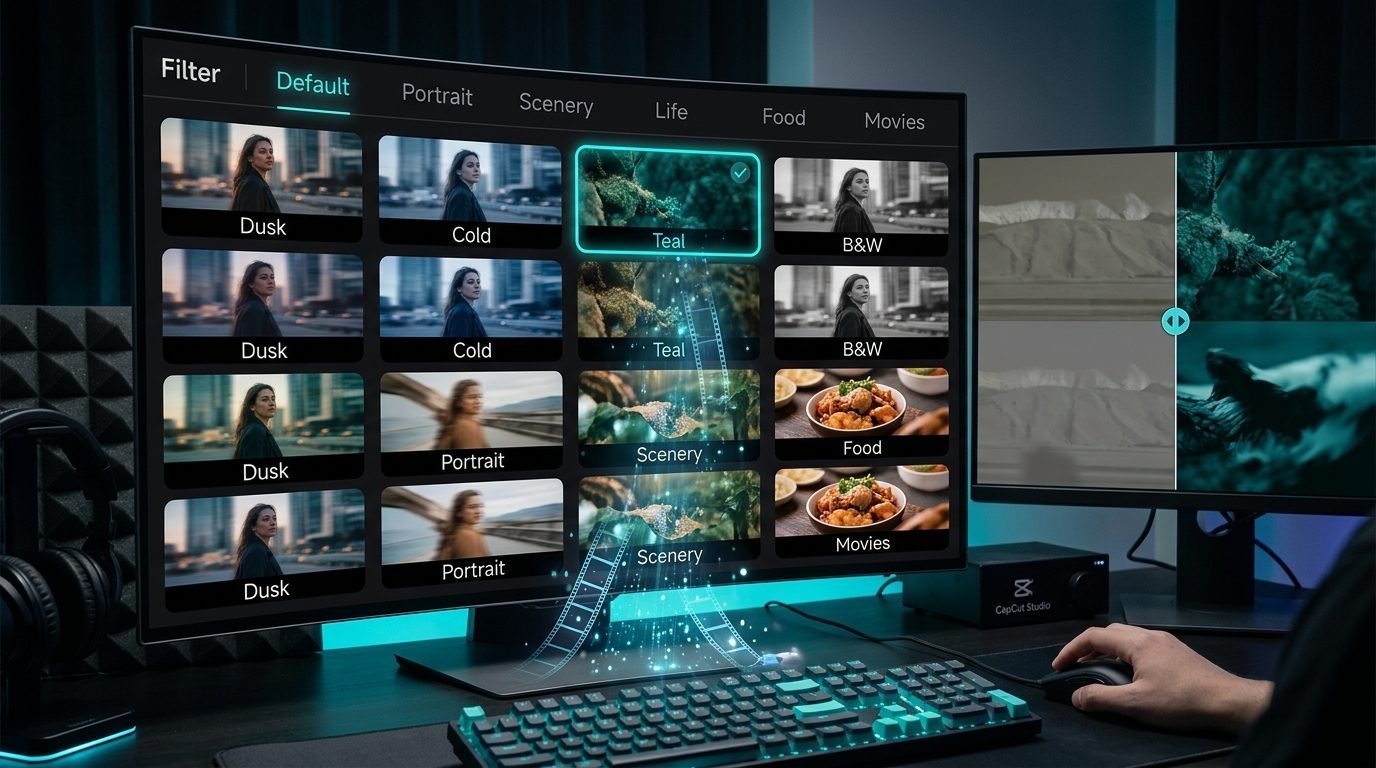
CapCut organizes its built-in LUTs into several categories, each targeting a different mood or use case. Knowing what each category is designed for saves you a lot of time scrolling through presets that do not fit your footage.
- Cinematic: Designed to mimic the color profile of film — often desaturated slightly with a warm shadow lift. Great for storytelling videos and short films.
- Outdoor / Nature: Enhances greens and blues to make landscape footage pop. Especially effective for travel and adventure content.
- Portrait: Prioritizes warm, flattering skin tones. Ideal for talking-head videos, interviews, and beauty content.
- Dark & Moody: Deep shadows, cool tones, and reduced saturation. Perfect for dramatic storytelling or night footage.
- Bright & Airy: Lifted shadows, warm highlights, and a soft contrast curve. Popular for lifestyle, fashion, and aesthetic content.
- Vintage / Film: Adds a grain-like quality and slightly faded colors to mimic the look of analog film stock.
- Log Correction: Specifically designed for footage shot in log profiles. Do not use these on standard footage.
In 2026, CapCut has also added seasonal LUT packs — Golden Hour, Winter Mist, Summer Haze, and similar — which work especially well for creators who want a specific aesthetic tied to a time of year or location. These rotate periodically, so check the library regularly for new additions.
How to Save Your Favorite LUTs for Future Projects
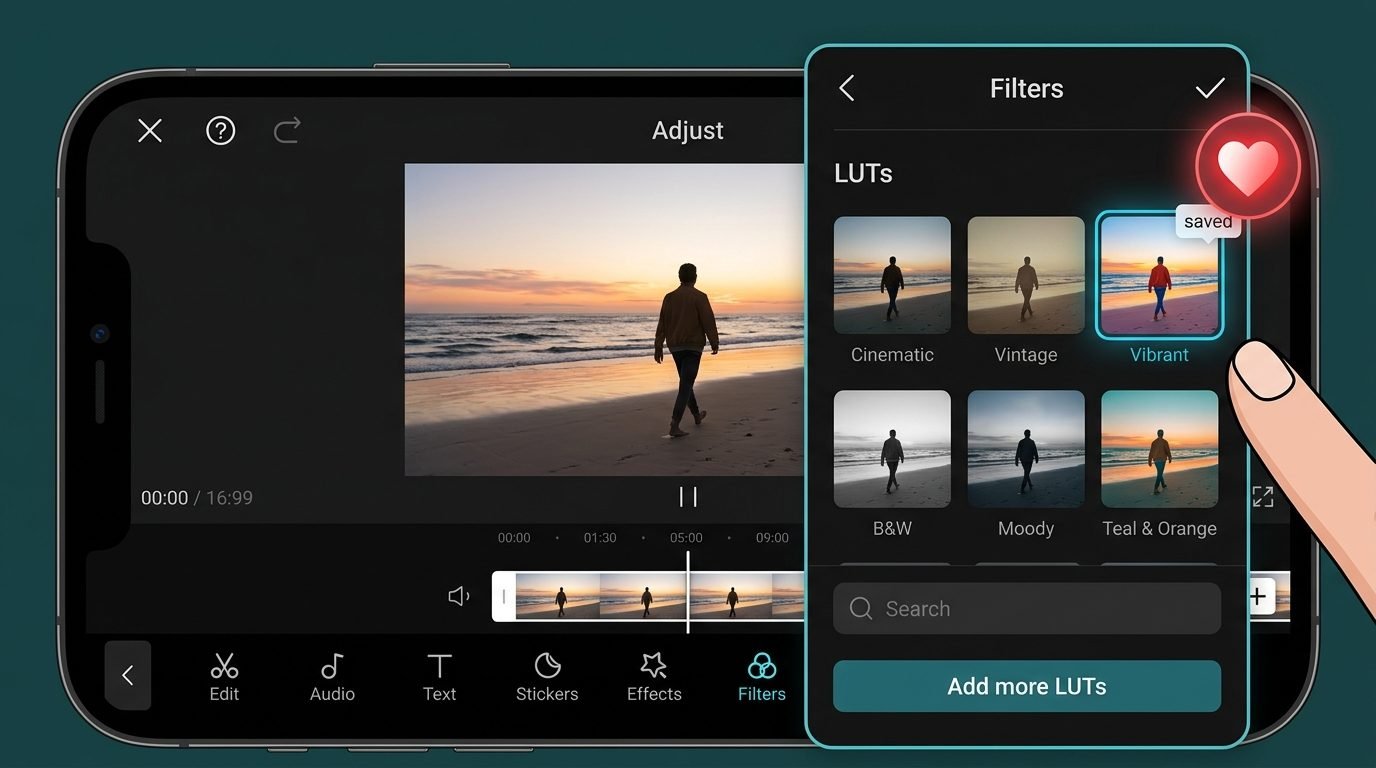
If you find a LUT that works beautifully with your camera and filming style, you will want to reuse it without hunting for it every time. CapCut makes this easy. While browsing the LUT library, long press on any preset to see the option to add it to your Favorites or save it to a custom collection.
In 2026, CapCut also introduced the ability to save a full color grade — LUT plus all manual adjustments — as a personal preset. Tap the three-dot menu in the color panel and choose Save as Preset. Give it a name, and it will appear in your My Presets section the next time you open the color tools. This is one of the best workflow improvements for creators who maintain a consistent visual style across their content.
You can also copy your color settings from one clip and paste them onto other clips in the same project. Select the graded clip, tap Copy Style, then select the other clips and tap Paste Style. This saves enormous amounts of time when editing multi-clip videos where you want a unified look throughout.
LUTs vs Filters in CapCut — What Is the Difference?
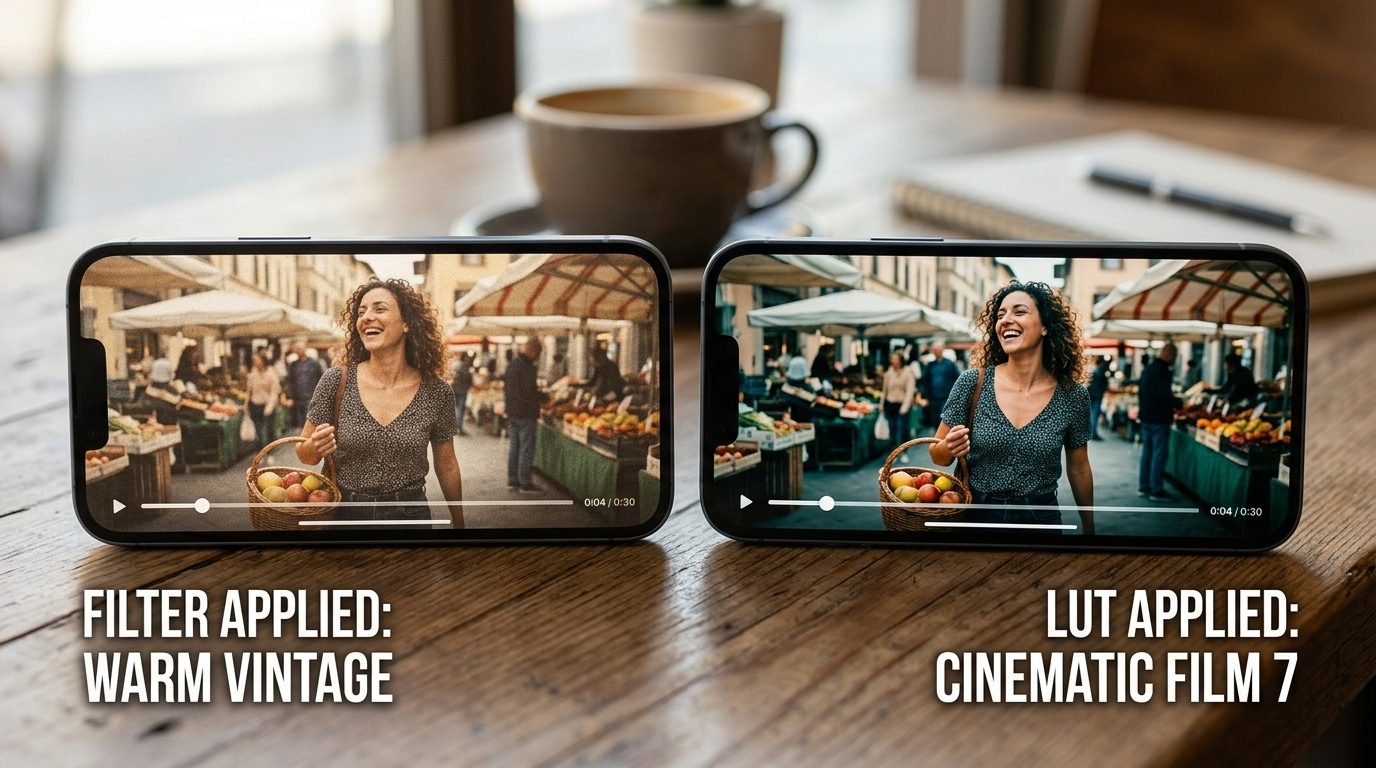
CapCut has both Filters and LUTs, and beginners often wonder if they are the same thing. They are not — and understanding the difference helps you decide which tool to use for a given situation.
Filters in CapCut are all-in-one presets that often combine color adjustments with vignettes, grain, and other stylistic effects. They are designed to be applied quickly and produce a complete, finished look with one tap. They are great for fast edits and casual content but offer less flexibility.
LUTs, on the other hand, only affect color. They do not add grain, vignettes, or other visual effects — they purely transform the color mapping of your footage. This makes them more versatile and easier to combine with other tools. Because LUTs only handle color, you have more control over the final look, and you can layer manual adjustments on top without fighting against a filter’s extra effects.
| LUTs | |
| What they affect | Color grading only — hue, contrast, saturation, tone |
| Customization | High — combine with manual adjustments freely |
| Custom imports | Yes — import your own .cube files |
| Best for | Professional, controlled looks with full flexibility |
| Intensity control | Yes — precise slider from 0 to 100 percent |
Common Mistakes Beginners Make With LUTs
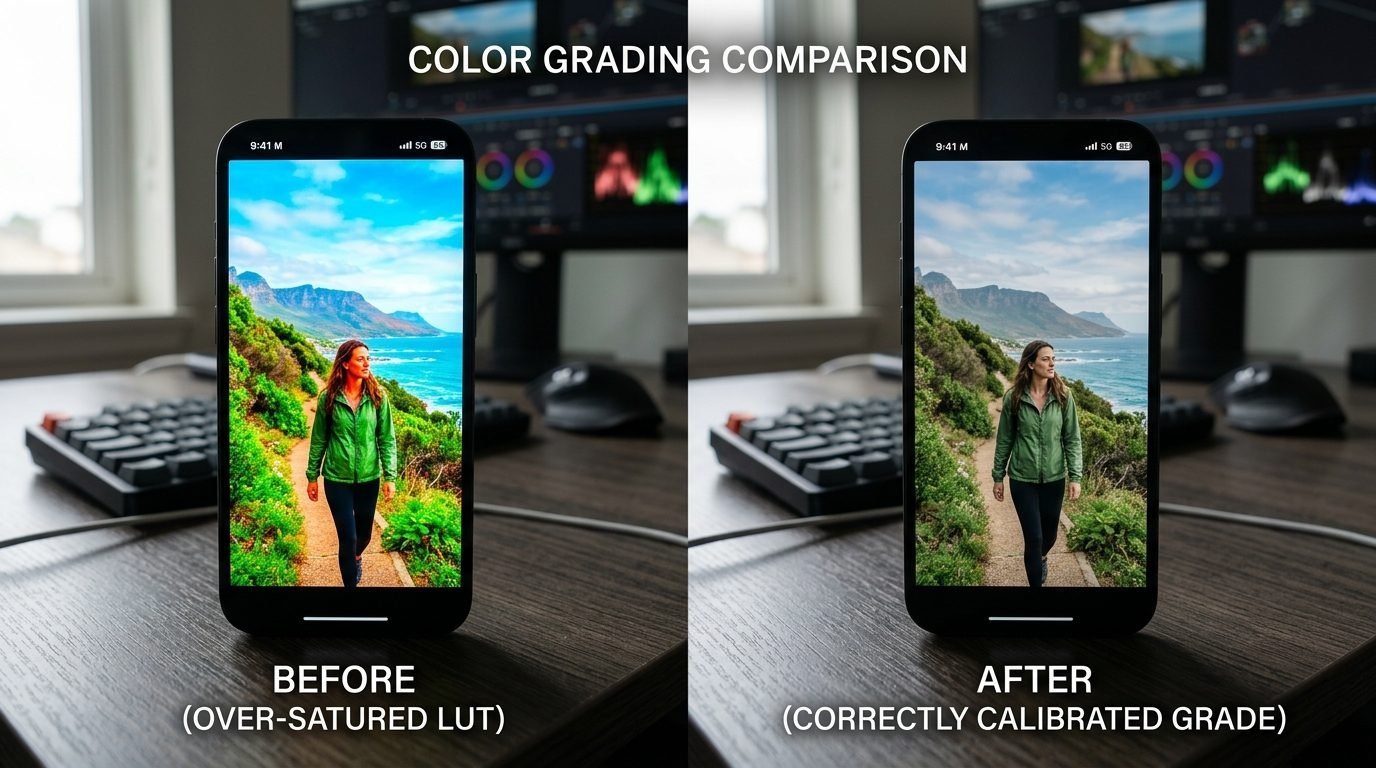
LUTs are powerful, which means there are also some easy ways to misuse them. Here are the most common mistakes new creators make — and how to avoid each one.
- Applying LUTs at full intensity: A LUT at 100 percent almost always looks overdone. Start at 60 to 70 percent and adjust from there. Subtle grading looks more professional than heavy-handed effects.
- Using Log LUTs on standard footage: Log correction LUTs are designed for flat, log-profile footage. Applying them to a normally exposed clip will make it look washed out and strange. Only use log LUTs if you specifically shot in a log profile.
- Not adjusting exposure before applying a LUT: LUTs work best on properly exposed footage. Fix your brightness and white balance first, then apply the LUT. Trying to fix a dark or blown-out clip with a LUT rarely works well.
- Applying different LUTs to every clip: Consistency is what makes a video look professional. Pick one or two LUTs and use them throughout your project rather than using a different one on each cut.
- Ignoring skin tones: Always check how a LUT affects the skin tones in your footage. Some LUTs that look great on landscapes turn people orange, green, or ashy. If the LUT flatters the scenery but not the person, reduce intensity or try a different preset.
- Not saving a favorite after finding it: Creators frequently find a perfect LUT during one project and then cannot remember which one it was for the next. Use CapCut’s Favorites or Presets feature immediately when you find something that works.
Frequently Asked Questions
Can I use LUTs in CapCut for free?
Yes, CapCut includes a library of built-in LUTs that are free to use on all versions of the app. Some premium LUT packs may require a CapCut Pro subscription, but there is a solid selection available without any paid tier. You can also import your own free .cube LUT files from creator communities and use them at no cost in any version of CapCut.
Can I create my own LUTs and use them in CapCut?
Yes, but creating a custom LUT from scratch requires external software such as a professional color grading tool that supports .cube export. A more beginner-friendly option is to build a look inside CapCut using manual adjustments, then save it as a personal preset using the Save as Preset feature. While this is not a portable .cube file, it achieves the same goal within the CapCut ecosystem and can be reused across your projects.
Why does my LUT look different on my footage compared to what I see online?
LUTs interact differently with footage depending on its original exposure, white balance, and color profile. A LUT that produces a beautiful cinematic look on one clip may look muddy or oversaturated on another. This is completely normal. The solution is to balance your footage first — correct exposure and white balance before applying the LUT — and then fine-tune intensity. Always grade on the actual footage you are working with, not based on a preview made with different source material.
Does applying a LUT reduce my video’s export quality?
No. LUTs are a color transformation applied on top of your footage — they do not compress or degrade the actual video data. When you export from CapCut, the LUT is baked into the final render, but the resolution and quality you choose at export (such as 1080p or 4K) remain fully intact. Always export at the highest quality your intended platform supports to preserve detail.
What is the difference between a 1D LUT and a 3D LUT, and which does CapCut use?
A 1D LUT adjusts brightness levels for each color channel individually, while a 3D LUT maps the full three-dimensional color space and can make complex adjustments to hue, saturation, and luminance simultaneously. CapCut uses 3D LUTs, which is why its color transformations look so rich and nuanced compared to simple filters. The .cube files you import are also 3D LUTs, making them the professional standard for serious color grading work.
Can I apply a LUT to just part of a clip in CapCut?
Yes, in CapCut 2026 you can use the LUT Masking feature to apply a color grade to a specific region of your frame. You can also split a clip at a specific point and apply different LUTs to each portion. The keyframing tool lets you fade a LUT in or out over time, which is useful for gradual mood transitions. These features give you significantly more creative flexibility than earlier versions of the app allowed.
Ready to Take Your CapCut Skills Further?
Now that you know exactly how to add, import, and fine-tune LUTs in CapCut, your videos are going to look a lot more polished. Color grading is one of those skills that pays off immediately — even small, subtle LUT adjustments can make a significant difference in how professional your content appears.
If you want to keep improving, check out our related guide: How to Color Grade Videos in CapCut Like a Pro — it covers manual adjustment techniques that work perfectly alongside your LUTs and takes your editing to the next level. Your next great video is closer than you think.