Introduction
Reversing a video can add a fun, creative twist to your content. It changes the sequence and flow, giving your videos a mesmerizing effect. By applying a reverse effect, you can create more engaging and captivating videos that stand out.
For content creators, reversing a video is a powerful way to increase audience engagement and attention. The best part? You don’t need advanced editing skills to do it — even beginners can easily reverse videos using CapCut.
Here’s a complete guide on how to reverse a video in CapCut across desktop, mobile, and online platforms.
How to Reverse a Video in CapCut Desktop Editor (PC)
You can easily reverse your videos on a PC by using the CapCut Desktop Editor.
First, download and install the CapCut editor on your computer. Once set up, follow these steps:

- Open the CapCut desktop editor and click on “Create Project.”
- Click the “Import” button and upload your video.
- Drag and drop your video onto the editing timeline.
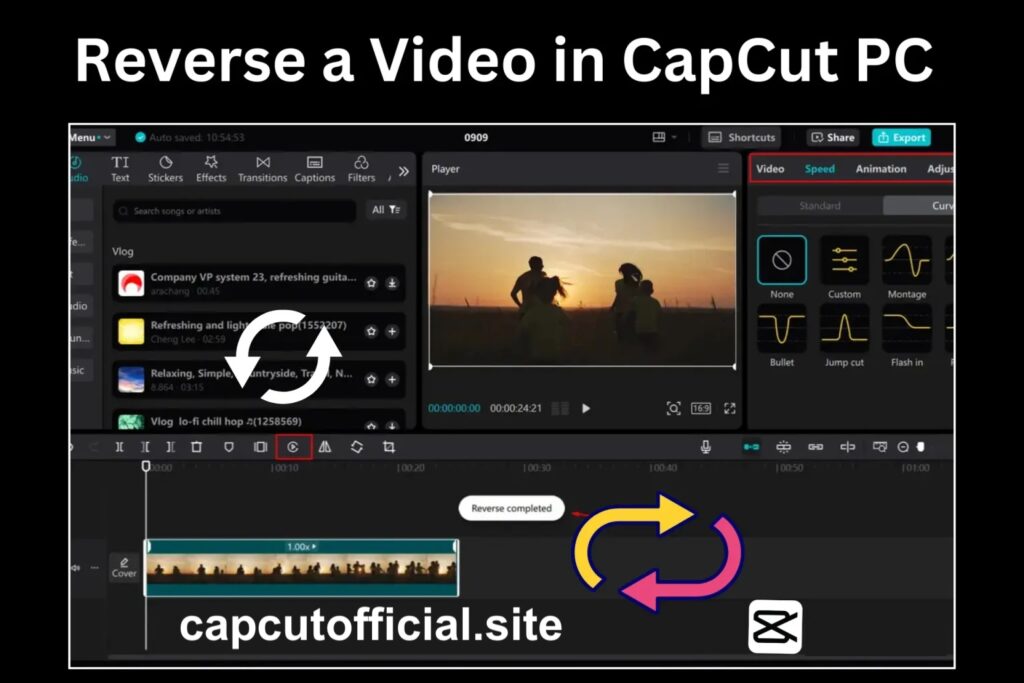
- From the toolbar above the timeline, click on the “Reverse” icon.
- Wait for the reversing process to complete.
- After reversing, you can enhance your video with filters or directly click “Export” to save the final reversed version.
How to Reverse a Video Using the CapCut Mobile App
The reverse feature is also available for Android and iOS users. It’s simple and beginner-friendly.
Make sure you have the latest version of the CapCut mobile app installed and are signed in.

Here’s how you can reverse a video on mobile:
- Open the CapCut mobile app and tap “New Project.”
- Upload the video you want to reverse.
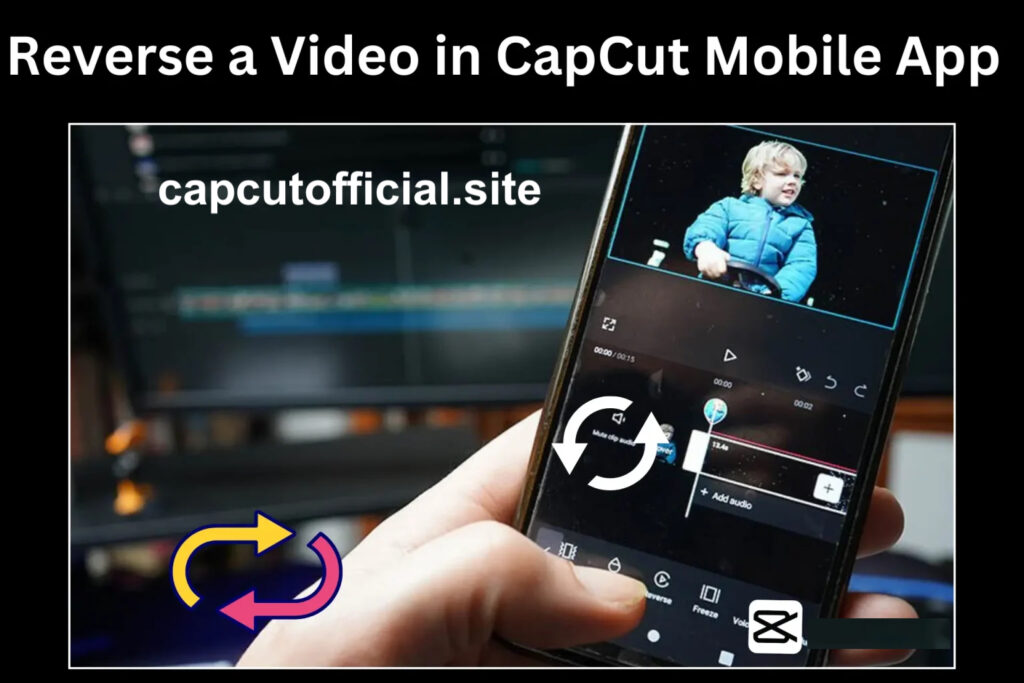
- Once uploaded, navigate to the toolbar and select “Reverse.”
- Wait for the process to finish.
- Tap the “Export” button, then save the reversed video to your device for easy sharing.
How to Reverse a Video Using CapCut Online
If you don’t want to install CapCut on your device, you can use the CapCut Online Editor. Here’s how:
- Visit CapCut’s official online editor and log in to your account.
- Click “Upload” to add your video.
- Drag your video onto the editing timeline.
- Click on the “Reverse” option from the toolbar.
- Once the process is complete, download the reversed video to your device.
Tips for Making Your Reverse Videos More Creative
Want to make your reversed videos even more impressive? Try these ideas:
- Add background music or sound effects to make your video more engaging.
- Use speed effects and dramatic filters for a cinematic feel.
- Introduce flashbacks to give your video a nostalgic or storytelling touch.
- Apply filters and transitions between clips for a smooth viewing experience.
- Experiment with slow-motion effects to create stunning visuals.
Conclusion
Reversing videos in CapCut is simple, quick, and can add a fresh, creative twist to your content.
Whether you’re using a PC, mobile app, or online editor, CapCut makes the process easy. Plus, you can enhance your reversed videos with filters, effects, and background music to make them even more memorable.
Follow these steps carefully, and enjoy creating stunning reversed videos for sharing with your audience!
FAQs – Frequently Asked Questions
Can I export high-quality reversed videos?
Yes, CapCut maintains video quality during export — you can even export in 4K resolution.
Can I reverse videos in all formats?
CapCut supports popular formats like MP4, MOV, and AVI. For other formats, you may need to convert them before reversing.
Is it possible to add music and sound effects to reversed videos?
Absolutely! CapCut allows users to add background music, sound effects, and even voiceovers to reversed videos.
Can I reverse and edit videos without downloading the app?
Yes, CapCut offers an online video editor where you can reverse and edit your videos directly from your browser.


